Thinking about installing laminate floors yourself? You don’t need to be a pro—just a bit patient and ready to roll up your sleeves.
With the right prep and tools, you can knock it out in a weekend. We’ll cover the nitty-gritty so you can skip the stress and get straight to laying down a floor you’ll actually be proud of.
Key Notes
- Stagger seams at least 12 inches between rows for strength and natural appearance.
- Allow 1/4 inch expansion gap using spacers between flooring and walls.
- With basic tools, you can complete a 200-300 sq ft room in 6-8 hours.
Tools and Materials for Laminate Floor Installation
Before jumping into laminate flooring installation, gather all the tools and materials to complete the job. Having everything on hand saves you time and frustration.
- Measuring tape: For accurate measurements when cutting laminate planks.
- Saw: A miter or jigsaw for precise cuts and trimming around corners and doorways.
- Spacers: To maintain expansion gap between floor and walls.
- Tapping block and pull bar: These lock planks in place without damaging the edges.
- Safety gear: Protective eyewear, knee pads, and dust masks.
- Moisture barrier: If installing over a concrete subfloor.
Preparing The Floor
Before you can lay laminate flooring, your subfloor must be in top condition. Here’s what you need to know:
Subfloor
The subfloor should be clean, dry, and level. Use a leveling compound to fix any low spots. Check the level by laying a long board across the surface and measuring gaps underneath it.
Removing Old Flooring
If you’re replacing existing flooring, remove it carefully. Check for nails, staples, and glue to ensure the subfloor is smooth.
Moisture Barriers
If you’re working with concrete subfloors or in a high-humidity area, a moisture barrier is a must. Lay it down before installing your laminate for extra protection.
How To Lay Laminate Flooring: Step-by-Step
Once your floor is prepared, it’s time for installation:
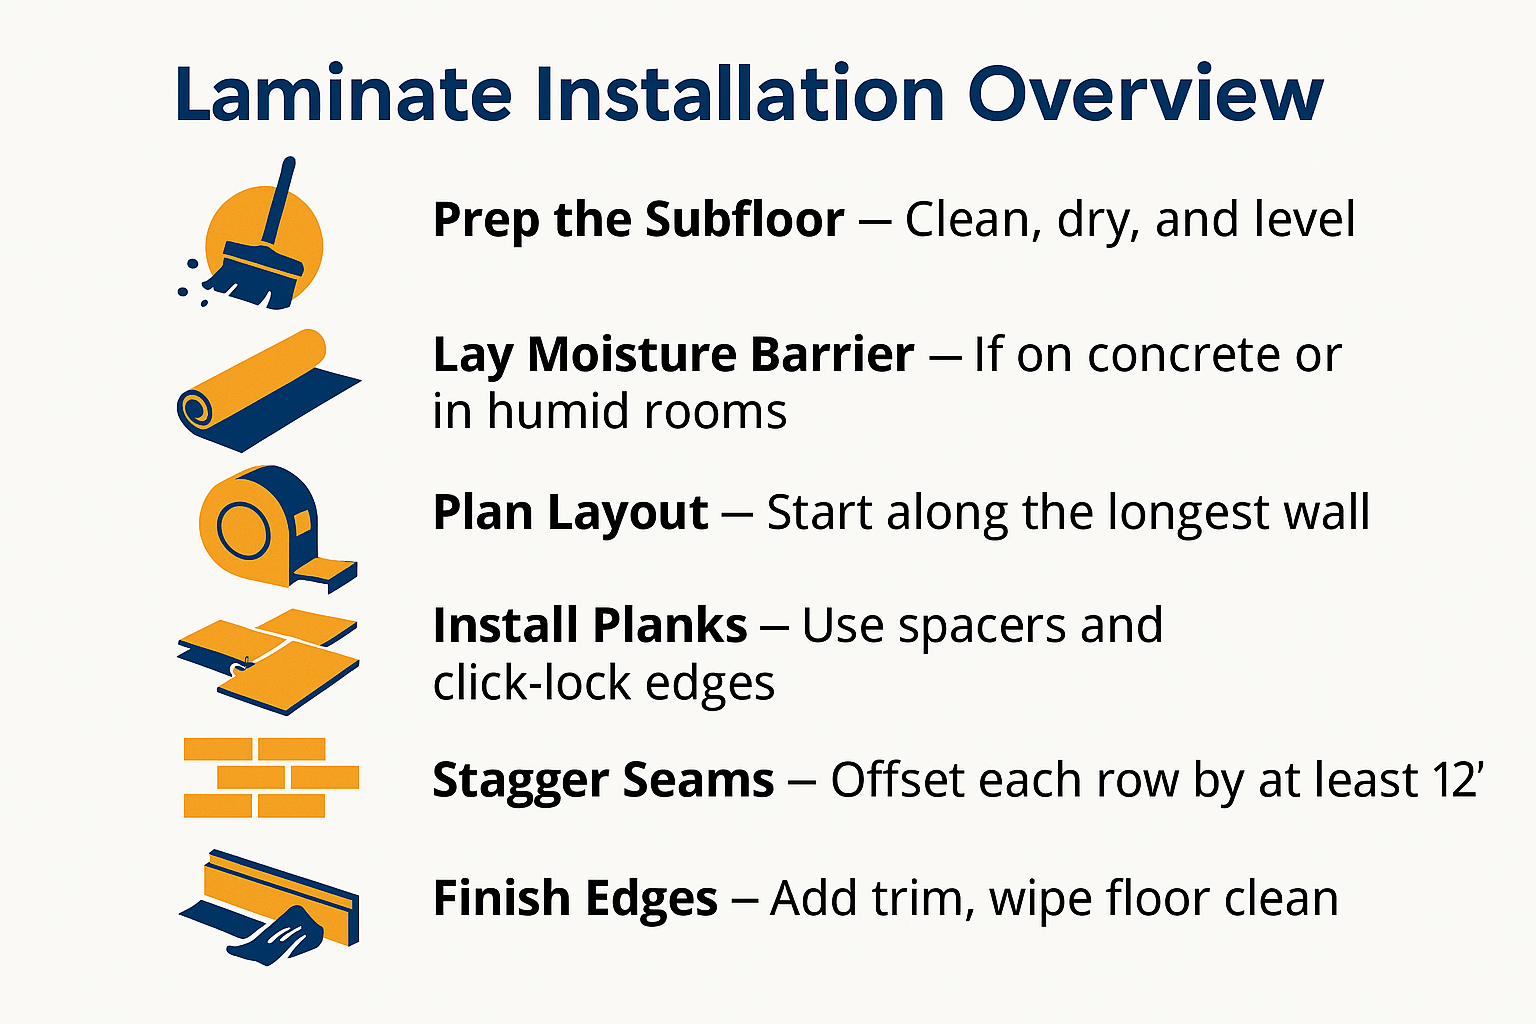
1. Where To Start
Not sure where to start laying laminate flooring in a room? Begin by laying planks along the longest wall. This ensures the flooring looks uniform and stretches across the room’s width.
Leave about a quarter-inch gap between the planks and the wall to allow for expansion.
2. Staggering
Staggering minimizes weak spots and creates a more natural appearance. Aim to stagger the seams of the laminate by at least 12 inches from one row to the next.
This improves the overall strength and stability of the floor.
3. Click Flooring Installation
Most laminate floors have a click-lock design, making installation easy. Simply insert the tongue of the plank into the groove of the previous one at a 45-degree angle, then lower it into place.
Use the tapping block to lock the planks together tightly without damaging the edges.
4. Cutting Laminate Planks
When you reach the end of a row, cut the planks to fit. For precision cutting, measure the space carefully and mark the cut with a pencil.
5. Fitting Techniques
Make sure each plank is tightly fitted. Tap gently with a mallet to lock the planks together. Using a pull bar is helpful when the last piece in a row is difficult to push into place.
6. Finishing Laminate Floors
Once all the planks are laid down, it’s time for the finishing touches.
Reinstall the baseboards and trim around the edges of the room. If there are any gaps between the laminate and the wall, use quarter-round molding to cover them up.
Finally, wipe down the floor to remove any dust or debris from the installation process.
DIY Tips for a Successful Laminate Floor Installation
Here are some DIY tips to make your installation easier and more efficient:
1. Use Spacers
Spacers for laminate flooring are vital to create expansion gaps. This ensures your floor doesn’t buckle or warp when the temperature changes.
2. Precision Cutting Tips
For clean cuts, score the laminate with a utility knife along your marked line before snapping it. This method works well for straight cuts and ensures a smooth edge.
3. Fitting Around Obstacles
Doorways and cabinets present challenges when laying laminate flooring. For doorways, make precise measurements and use a saw to trim the laminate planks to fit.
If cabinets are in the way, remove the baseboard or adjust the planks around them to ensure a proper fit.
If installing laminate with radiant floor heating, leave a larger gap around the edges to allow for expansion as the floor heats up.
How Long To Install Laminate Flooring
The time it takes to install laminate flooring varies. For a 200-300 square foot room, a beginner can expect to spend about 6-8 hours.
Professional installers often complete the job in 3-4 hours, as they have the tools and experience to work efficiently.
Remember the preparation process, including cleaning and leveling the subfloor, adds extra time, so make sure to plan for at least a full day if you’re a first-timer.
Professional Installers vs. DIY Flooring Installation
Which is best for you? Here are a few things to keep in mind:
- Cost: Professional installers charge around $1-3 per square foot for installation.
- Skill and experience: If you’re a beginner, things could get tough. But persevere with patience and the right tools.
- Quality of work: Professionals deliver flawless results and usually offer warranties.
Second-Guessing The Weekend DIY Plan?
Frequently Asked Questions
Can a beginner install laminate flooring?
Yes, a beginner can install laminate flooring with the right tools and some careful planning. It’s important to read the instructions, take your time, and avoid rushing through the process.
What do you put under laminate flooring?
You usually put underlayment under laminate flooring. It provides soundproofing, helps smooth out minor imperfections in the subfloor, and adds insulation.
How do I stagger laminate flooring?
To stagger laminate, start each new row with a plank at least 12 inches longer or shorter than the previous row’s end plank. This prevents visible seams from lining up.
Conclusion
Laminate flooring is one of those projects that look easier than it is—until you’re mid-install wondering why that one plank just won’t click. But now you know: it all starts with a level subfloor, the right expansion gaps, and a bit of patience.
From staggering your rows to trimming around doorways, these small details go a long way in making the floor look seamless.
If you’d rather skip the sawdust and get it done right the first time, reach out for a free quote on professional flooring installation—no pressure, just options.